Miters, or miter joints, are a type of joint in woodworking where two pieces of material meet at an angle. The cut angle is typically 45 degrees, creating a 90-degree angle when the two pieces are joined together. Here we are going to cover:
- The ONE Rule for Miters
- Mitering Free Hand with a Hand Plane
- Use a Shooting Board and a Hand Plane to Miter
- Using a Miter Saw
- Mitering With a Table Saw
The ONE Rule for Cutting Perfect Miters
To make perfect miters, the most important part is to undercut your desired degree ever so slightly. No board or cut is perfect, but this is the best way to have a perfect look after glue up. When looking to cut a 45-degree miter, you actually want to cut a ~44.9-degree angle. That way when you put the two boards together, the visible outside corners have absolutely no separation after being assembled.

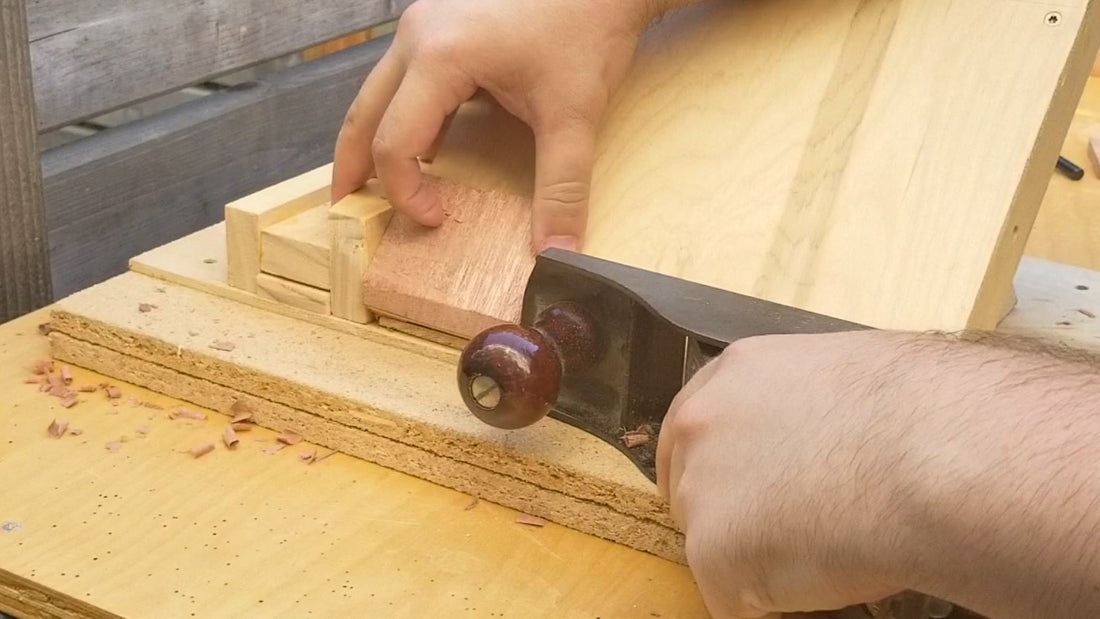
Mitering Free Hand with a Hand Plane
It is completely possible to cut a miter free hand with a hand plane. Mark the edge of the area you need to plane down, then holding your hand plane at the right angle, slowly work down the piece until you are at your indicator lines. This is the same process, though more exact than when adding chamfers or edge profiles to boards.

Mitering With a Shooting Board and a Hand Plane
A shooting board is a common tool used when preparing boards by hand. It is a jig for your hand plane that allows you to make repeated cuts to help square your boards. You can make a jig called a ‘Donkey’s Ear’ to work with your shooting board or build a custom angled shooting board for that specific task to help you make consistent and repeatable miters by hand.

TIP: See how to build a shooting board with a donkey ear jig with our YouTube video: Shooting Board and Jigs Build!
Mitering With a Miter Saw
A miter saw has precision marking to allow you to choose your angle effortlessly and is easy to use. A compound miter saw allows you two options by also having a head that can tilt. The main drawback is that it can’t be used for small pieces and anyone who owns one will tell you it makes a mess with wood shavings.

Mitering With a Table Saw
Most table saws come with a basic miter gauge allowing you to make two different types of miters cuts out of the box. Depending on where you need the angle, you can either tilt the table saw blade to the appropriate degree or use a miter gauge to angle your board to get the correct angle. That are many more precise miter cut jigs for the table saw available if you find yourself preferring to cut in this manner, they would be a good investment.

When choosing how to cut your miters, your first limitation is your tools, but your second is your safety. Do not attempt any cuts you are not comfortable making safley.